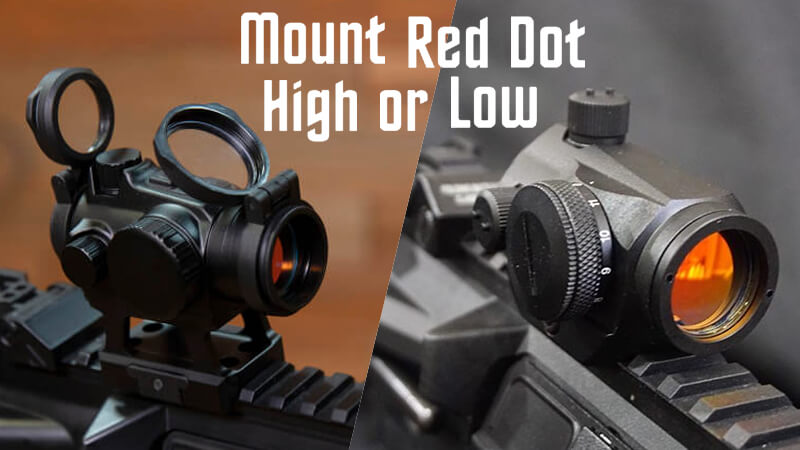
If you’re new to shooting with a Red Dot Sight (RDS), you might ask yourself, “Should I mount my red dot high or low?” The positioning of your red dot can significantly impact your shooting performance, so it’s essential to take the time to make the right decision.
One thing to consider is that mounting the red dot high allows for faster acquisition and easier tracking of moving targets. However, a lower mount may provide better precision and accuracy at longer ranges.
In this article, we’ll discuss the best ways to mount and adjust for your red dot, so you can decide which option works best for your shooting needs.
Choose The Right Mounting Technique
For several reasons, selecting the proper mounting method for an RDS is essential.
First, an incorrectly mounted RDS can reduce your accuracy and make it harder to aim precisely. Second, a poorly mounted may come loose while in use, which could be harmful and result in injury.
Finally, using the proper mounting technique can enhance your shooting experience overall, making it more relaxing and enjoyable.
Mounting techniques for red dot sights include
- Picatinny Rail Mounting: RDS is frequently mounted using this method. It is adaptable and works with many different firearms. It provides a stable and secure mounting platform and is also simple to install. Allow the RDS to be removed quickly and easily; this is helpful if you need to switch between different optics.
- Weaver Rail Mounting: Although they have slightly different designs, these are comparable to Picatinny rails. Some RDS have a Weaver-style mount that can be attached to a Weaver rail directly or with an adapter.
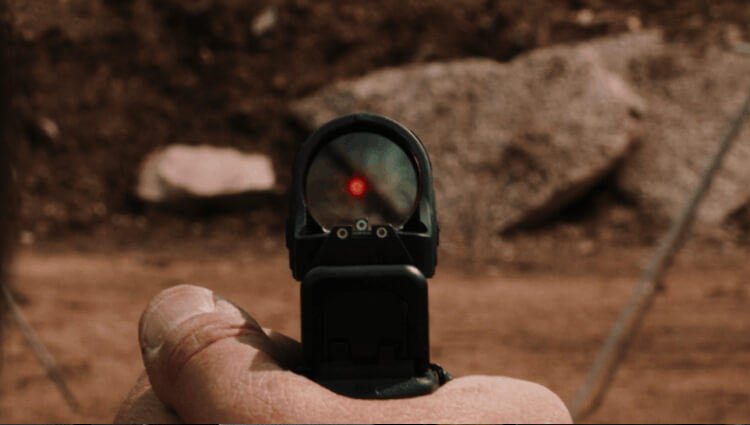
- Direct Mounting: A mounting system for an RDS may be built into some firearms. Using a mounting plate, RDS can be mounted directly onto the slide of some handguns, such as the Glock MOS series.
- Mounting with Adapter Plates: An adapter plate can attach an RDS to a firearm without an integrated mounting system. Adapter plates are available in various shapes and sizes to fit various RDS and firearm models.
- Co-Witness Mounting: Co-witnessing allows you to align your iron sights with your RDS, providing a backup sighting option if your RDS fails. It is typically low profile, which allows for a lower mount height and shooting accuracy. However, it may require modifications to your firearm and can be more challenging to install than other mounting techniques.
- Offset Mounting: Offsetting enables you to mount your RDS at an angle, giving some shooters a more comfortable shooting position. It is practical for guns with little rail room or shooters who favor a particular shooting position. However, installation can be difficult and may call for specific mounting hardware.

Install The Sight Base On Your Rifle Or Pistol
Installing an optics base on your rifle or pistol is critical in setting up your firearm. Before starting the installation process, ensure you have all the necessary tools. This typically includes a screwdriver set, a level, and a torque wrench. Depending on the type of optic base you’re installing, you may also need a drill or other specialized tools.
- Remove Any Existing Optic Base: If your firearm already has an optic base installed, you’ll need to remove it before installing the new one. This typically involves removing screws or other fasteners holding the sight base.
- Clean the Mounting Surface: Once the old optic base is removed, clean the mounting surface thoroughly with a solvent to remove any dirt or debris. This will ensure a secure and stable attachment of the new optic base.
- Attach the New Optic Base:
- Carefully align the new optic base with the mounting surface on your firearm.
- Ensure it is level and centered before tightening the screws or other fasteners to secure it.
- Be careful not to overtighten the screws, as this can damage the threads and compromise the stability of the optic base.
- Test the Alignment: Once the optic base is attached, test the alignment by looking through the optic and verifying that the reticle or crosshairs are centered on the target. If necessary, adjust the position of the optic base slightly to achieve proper alignment.
- Torque the Screws to Specified Values: Use a torque wrench to tighten the screws to the specified values provided by the manufacturer. This will ensure that the optic base is securely attached and will not loosen over time.
- Test Fire: Finally, test fire your firearm to ensure that the new optic base is properly installed and aligned. Make any necessary adjustments to the optic or mounting position to achieve the desired accuracy and precision.
Mount The Red Dot Sight On The Rifle Or Pistol
Many gun enthusiasts, hunters, and competitive shooters will upgrade their rifles or pistol with an RDS.
RDS have no magnification and allow for quick target acquisition at close range, while reflex sights have a slight magnification and are better suited for shots at 100 yards or more. Magnifiers can be added to both types of sights to increase magnification. Both sights make it easy to use and zero, eliminating the need for a front sight and rear sight.
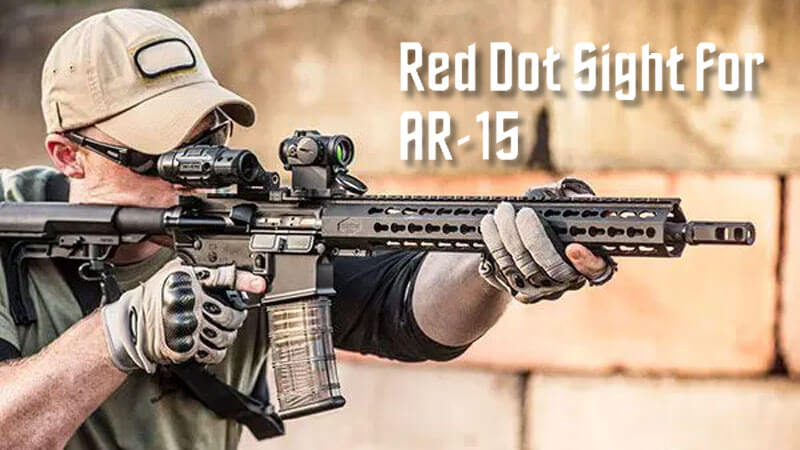
Minute of Angle (MOA) is used to measure adjustments on both red dot and reflex sights for precise shooting. AR-15 rifles are often equipped with either a red dot or reflex sight for improved accuracy.
RDS are significantly more advantageous than traditional iron sights because they enable quicker target acquisition, better accuracy, and a clearer view picture in a variety of shooting situations. To guarantee top performance and dependability, however, proper installation is essential.
Here are the steps to follow when mounting an RDS on a rifle or pistol:
- Choose the Right Mounting System: The best mounting system must be chosen first. Mounts come in various styles, including Picatinny, Weaver, and Dovetail mounts. Make sure the mounting system you choose is appropriate for your firearm.
- Clean the Firearm: The firearm must be thoroughly cleaned before mounting the optic. Consequently, no dirt or debris could affect how it is mounted or how well it works.
- Install the Mount: The mounting system installation comes next. A base attached to the weapon and a mounting plate attached to the optic makes up the mounting system in most cases. To secure the firearm’s base, use the screws that came with the mounting system.
- Attach the Optic: Attaching the optic to the mounting plate comes after the mounting system has been installed. Use the screws that are included to mount the optic on the mounting plate.
- Adjust the Optic: Put the optic in the desired position after attaching it. Ensure it is level and that the reticle is positioned in the center of the optic window.
- Test the Optic: Once mounted and adjusted, test it to ensure it functions correctly. Check for any inconsistencies or issues with optical alignment, reticle clarity, or zero. Make any necessary adjustments until it is functioning optimally.
How To Choose Between Mounting Your Red Dot High Or Low On Your Firearm?
Accuracy, comfort, and ease of use can all be significantly impacted by the height of an RDS on a firearm.
When deciding between a high or low mounting option for your RDS, take into account the following factors:
- Type of firearm: Your choice will be influenced by the kind of firearm you are holding. For instance, mount a red dot higher on a shotgun to easily acquire the target. On the other hand, mount a red dot lower if you’re mounting a rifle to keep your cheek weld constant.
- Shooting style: The ideal height for your RDS also depends on how you shoot. For instance, if you shoot with both eyes open, a lower mount may be needed to maintain both eyes open and a wide field of vision. A higher mount might be preferred if you shoot with one eye closed.
- Red dot sight type: A certain mounting height is required to use some RDSs. For instance, while some optics are intended to be mounted high, others may function best when mounted low.
- Comfort and ease of use: The most crucial consideration when selecting a mounting height is how convenient and comfortable it is for you. You should try a different mounting height if it is strenuous to see through the optic or if it is uncomfortable to use.
- Height over bore: The “height over bore” of your firearm should also be taken into account. This refers to separating the RDS’s height and the bore’s centerline. The height may impact accuracy at longer ranges over the bore of the RDS, which increases as it is mounted higher.
How does the sight base height affect accuracy?
The height of an RDS’s base can affect accuracy in two ways: the ease of acquiring a view picture and the trajectory of the bullet.
The optimal height will depend on the firearm type, the shooter’s body geometry and shooting style, and the distance to the target. Other factors like wind, bullet weight, and velocity will also affect accuracy.
Experimenting with different heights and positions is important to find the best red dot configuration for individual needs.
When should I use a high mount?
A high mount for a firearm is used when the shooter wants to achieve a higher-sight picture. For example, it can be helpful for long-range shooting, hunting in dense foliage, or using a large scope requiring more clearance.
High Mounting
Pros:
- It can make it easier to acquire the target, especially on shotguns or handguns.
- It can provide a wider field of view.
- It can be more comfortable for shooters who close one eye.
Cons:
- It may be less comfortable for shooters who keep both eyes open.
- This may result in more parallax errors.
- It may increase the height over bore, impacting accuracy at longer distances.
When should I use a low mount?
A low mount for a firearm can be advantageous for quick target acquisition, shooting close-quarters, and concealed carry. It can make it easier to acquire targets quickly, maintain a stable shooting position, and draw the weapon quickly and smoothly.
Low Mounting
Pros:
- It can provide a consistent cheek weld, which can improve accuracy.
- It may be more comfortable for shooters who keep both eyes open.
- It can reduce the height over bore, improving accuracy at longer distances.
Cons:
- This can make it more difficult to acquire the target, especially on shotguns or handguns.
- This may result in a narrower field of view.
- Maybe less comfortable for shooters who close one eye.
Examples Of Optimal Mounting Positions For Various Red Dot Sights
Here are some examples of optimal mounting positions for various RDSs:

Note: The term “lower 1/3 of the co-witness” describes a mounting position in which the RDS is positioned slightly above the iron sights but not exactly in the center. This enables a more precise sight picture and simpler target acquisition.
It is important to note that optimal mounting positions can vary depending on the firearm and personal preferences. Therefore, testing different mounting positions and adjusting to find the most comfortable and effective position is recommended.
Adjust The Optic For Proper Eye Relief And Aim Point
First, to adjust an RDS for proper eye relief and aiming point, mount the optic on the firearm and position it for comfortable viewing. Next, adjust the eye relief by moving the optic forward or backward until you can see the entire field without moving your head.
To avoid overcorrection, make minor adjustments to the point of aim using the optic’s adjustment screws and fire a few shots between each adjustment. You can use and benefit from an RDS by making the adjustments necessary for accurate shooting.
Takeaway
Improving your shooting efficiency requires carefully selecting the mounting height for your red dot sight. ARORY is an excellent option for those looking for high-quality, dependable sights that provide exceptional accuracy and durability, although there are many other options.
Our red dot sights are precisely engineered to withstand the most demanding shooting environments. In addition, we provide a range of mounting choices, including high and low options, so that you can tailor your sight to your particular requirements and tastes.
So why not see the difference a high-quality product can make? Happy shooting!


Leave A Comment
You must be logged in to post a comment.