
Attaching and aligning a red dot sight on your AR-15 can be tricky business. Even an experienced gunsmith can struggle to get it right. I remember the first time I tried installing one: after hours of work, my sights were still misaligned – and all I had was frustration to show for it! Fortunately, mastering precision is possible with the right guidance. In this comprehensive guide, you’ll learn how to mount your red dot and align it like a pro so that you can hit your targets every single time.
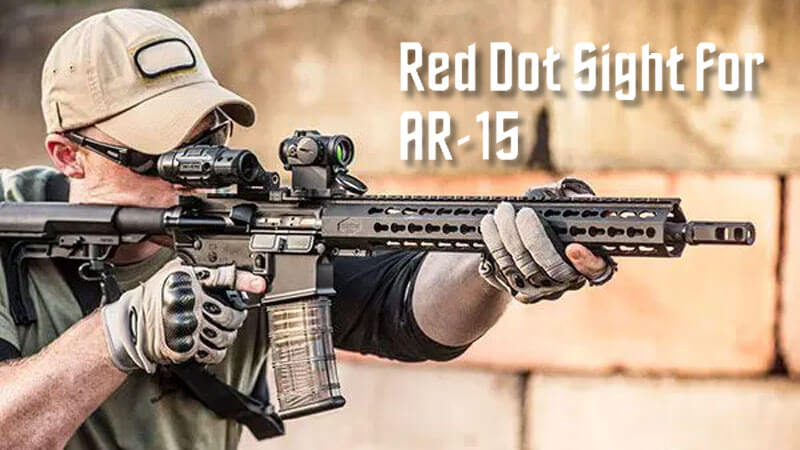
Red dot sights, including reflex sights, are some of the most popular accessories used by shooters today. They offer clear line-of-sight aiming capabilities at close range and long distances alike – allowing you to make precise shots quickly and accurately. But these devices come with their own unique set of challenges when it comes to mounting them securely onto your firearm, whether it’s a pistol, handgun, or rifle like the AR-15. Whether you’re just getting started or brushing up on your skillset, this guide will provide you with everything needed to master the art of attaching and aligning a red dot sight on your AR-15’s upper receiver using a Picatinny rail system.
From selecting the right scope mount to properly adjusting windage and elevation settings, we’ll cover all the basics (and more!) in our detailed step-by-step approach. With this knowledge under your belt, you’ll have what it takes to confidently install any type of optics device, such as a riflescope, on your bolt-action rifle or other firearms – no matter where or when shooting takes place! Get ready; let’s dive into mastering precision together!
Enhancing Aiming Accuracy with a Red Dot Sight on Your AR-15
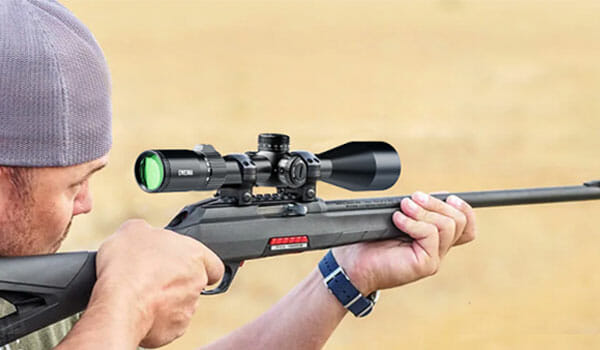
As a passionate hunting enthusiast, you’re well aware of the importance of accurate aiming and precision shooting. Your AR-15 rifle is a versatile and powerful tool that has proven its worth in various shooting scenarios. However, to truly unleash its full potential and elevate your shooting skills, it’s essential to equip your AR-15 with the right accessories. Enter the Red Dot Sight – a game-changing accessory designed to enhance your aiming accuracy and overall shooting performance.
The Red Dot Sight is a modern and sophisticated optical device that offers numerous benefits to shooters. With its illuminated reticle, rapid target acquisition, and ease of use, it has quickly become the go-to aiming solution for many AR-15 users. Whether you’re a seasoned hunter, a competitive shooter, or simply enjoy target practice, attaching a Red Dot Sight to your AR-15 can significantly improve your aiming precision and boost your confidence behind the trigger.
One of the key benefits of using a red dot sight is the ability to shoot with both eyes open, which greatly enhances peripheral vision and situational awareness. This is especially important when hunting or participating in competitive shooting events, as it allows you to stay aware of your surroundings and make quick, informed decisions.
In this comprehensive guide, we will explore the ins and outs of Red Dot Sights, delving into their advantages and disadvantages, as well as providing valuable insights on how to choose the right one for your AR-15. We’ll also take you through a step-by-step process of attaching and aligning the Red Dot Sight, ensuring it’s properly set up to maximize accuracy. Lastly, we’ll share expert tips and advice on optimizing the use of your Red Dot Sight in various shooting scenarios.
So, without further ado, let’s embark on this journey towards mastering precision and enhancing your AR-15 aiming accuracy with a Red Dot Sight. The thrill of hitting your targets with newfound consistency and precision awaits!
The Advantages and Disadvantages of Using a Red Dot Sight
In the world of hunting and shooting, every advantage counts. Red Dot Sights have gained significant popularity among AR-15 users for their numerous benefits. However, like any other accessory, they come with their share of drawbacks. In this section, we’ll delve into the pros and cons of using a Red Dot Sight to help you make an informed decision on whether it’s the right choice for your AR-15.
Pros
- Faster Target Acquisition
One of the most notable advantages of a Red Dot Sight is its ability to facilitate rapid target acquisition. With a Red Dot Sight, your eye can easily focus on both the reticle and the target simultaneously, allowing you to lock onto your prey with incredible speed. This is particularly useful when hunting fast-moving game or when engaging in competitive shooting events where time is of the essence.
- Improved Accuracy
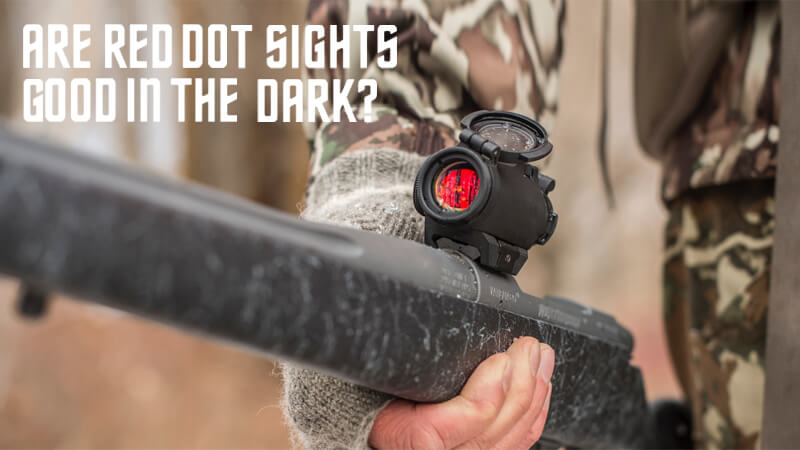
The illuminated reticle of a Red Dot Sight provides a clear and precise aiming point, regardless of lighting conditions or background noise. This feature significantly improves your accuracy, particularly at mid-range distances, where iron sights may prove to be less effective. By minimizing the margin of error in your shot placement, the Red Dot Sight ensures that you can hit your targets with precision and confidence.
- Better Follow-up Shots
In hunting scenarios, it’s not uncommon to require multiple follow-up shots to bring down your quarry effectively. Red Dot Sights excel in this department by providing a crisp, unobstructed sight picture that allows for quick and efficient follow-up shots. The lack of magnification means there is minimal distortion, enabling you to track and engage moving targets with ease.
Cons
- Battery Dependency
One potential drawback of Red Dot Sights is their reliance on batteries for power. While modern Red Dot Sights have improved battery life, it’s essential to be mindful of the power source and carry spare batteries during extended hunting trips. A dead battery in the field can render your Red Dot Sight useless, leaving you to rely on backup iron sights or alternative aiming solutions.
- Potential for Parallax Error
Although Red Dot Sights are designed to minimize parallax error, they are not entirely free from it. Parallax error occurs when the reticle appears to shift position relative to the target as the shooter’s eye moves off-center from the sight’s optical axis. While this issue is generally negligible in high-quality Red Dot Sights, it’s essential to be aware of the potential for parallax error and practice proper shooting techniques to mitigate its effects.
- Price
Lastly, the price of a Red Dot Sight can be a deterrent for some hunters. While there are affordable options on the market, high-quality Red Dot Sights can be quite expensive. It’s crucial to weigh the benefits against the cost and determine whether the investment is worth it for your specific hunting needs and preferences.
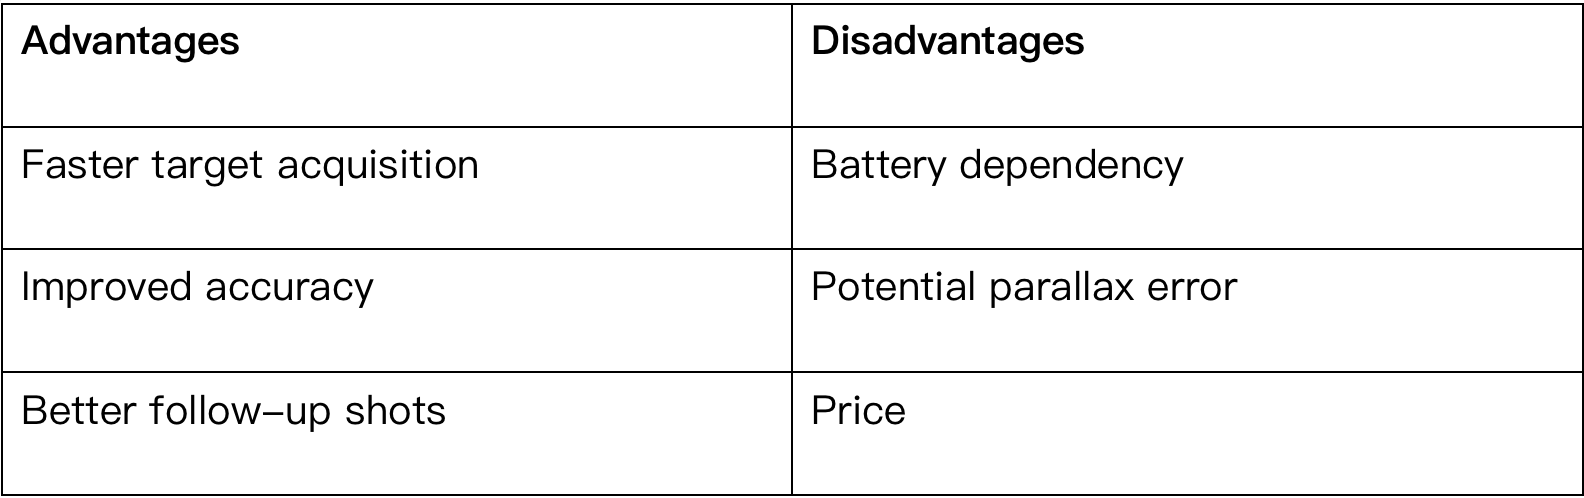
The following table summarizes the advantages and disadvantages of using a Red Dot Sight:
As we’ve explored the advantages and disadvantages of using a Red Dot Sight, you may be wondering how to choose the right one for your AR-15. With various options available on the market, it’s crucial to find a sight that meets your specific hunting needs and preferences. In the following section, we will guide you through the process of selecting the perfect Red Dot Sight for your AR-15, taking into account important factors such as size, weight, battery life, reticle options, and durability. By carefully evaluating these elements, you can ensure that you’re equipping your rifle with the most suitable aiming solution for your hunting adventures.
How to Select the Perfect Red Dot Sight for Your AR-15
Choosing the right Red Dot Sight for your AR-15 is a critical decision that can significantly impact your hunting experience. To help you navigate the myriad of options available, we’ve compiled a list of essential factors to consider and some recommended models and brands to suit various budgets and preferences.
Factors to consider: size, weight, battery life, reticle options, durability
- Size
Red Dot Sights come in various sizes, from compact designs to larger, more robust models. Consider the available space on your AR-15’s rail system and your preferred shooting style when selecting the appropriate size. A compact sight may be ideal for lightweight builds and quicker target acquisition, while a larger sight might offer more features and greater durability.
- Weight
Weight is an important factor to consider, as it can affect the overall balance and handling of your rifle. Lighter Red Dot Sights are generally more comfortable to carry during long hunting trips but may sacrifice durability or battery life. Heavier sights can provide increased stability but may weigh down your rifle, impacting maneuverability.
- Battery Life
As mentioned earlier, Red Dot Sights rely on batteries for power. Look for models with extended battery life to minimize the need for frequent battery replacements. Solar-assisted or dual-power models that use both batteries and solar panels can be a great option to ensure uninterrupted performance during your hunts.
- Reticle Options
The reticle is the illuminated aiming point within the sight, and it comes in various shapes, sizes, and colors. Some popular reticle styles include simple dots, crosshairs, and horseshoe designs. Consider your personal preferences and the types of targets you’ll be engaging when selecting the most suitable reticle for your hunting needs.
- Durability
A quality Red Dot Sight should be built to withstand harsh hunting conditions and the recoil of your AR-15. Look for sights with durable materials like aircraft-grade aluminum and features such as water, fog, and shock resistance to ensure your sight can endure the rigors of the field.
Recommended models and brands
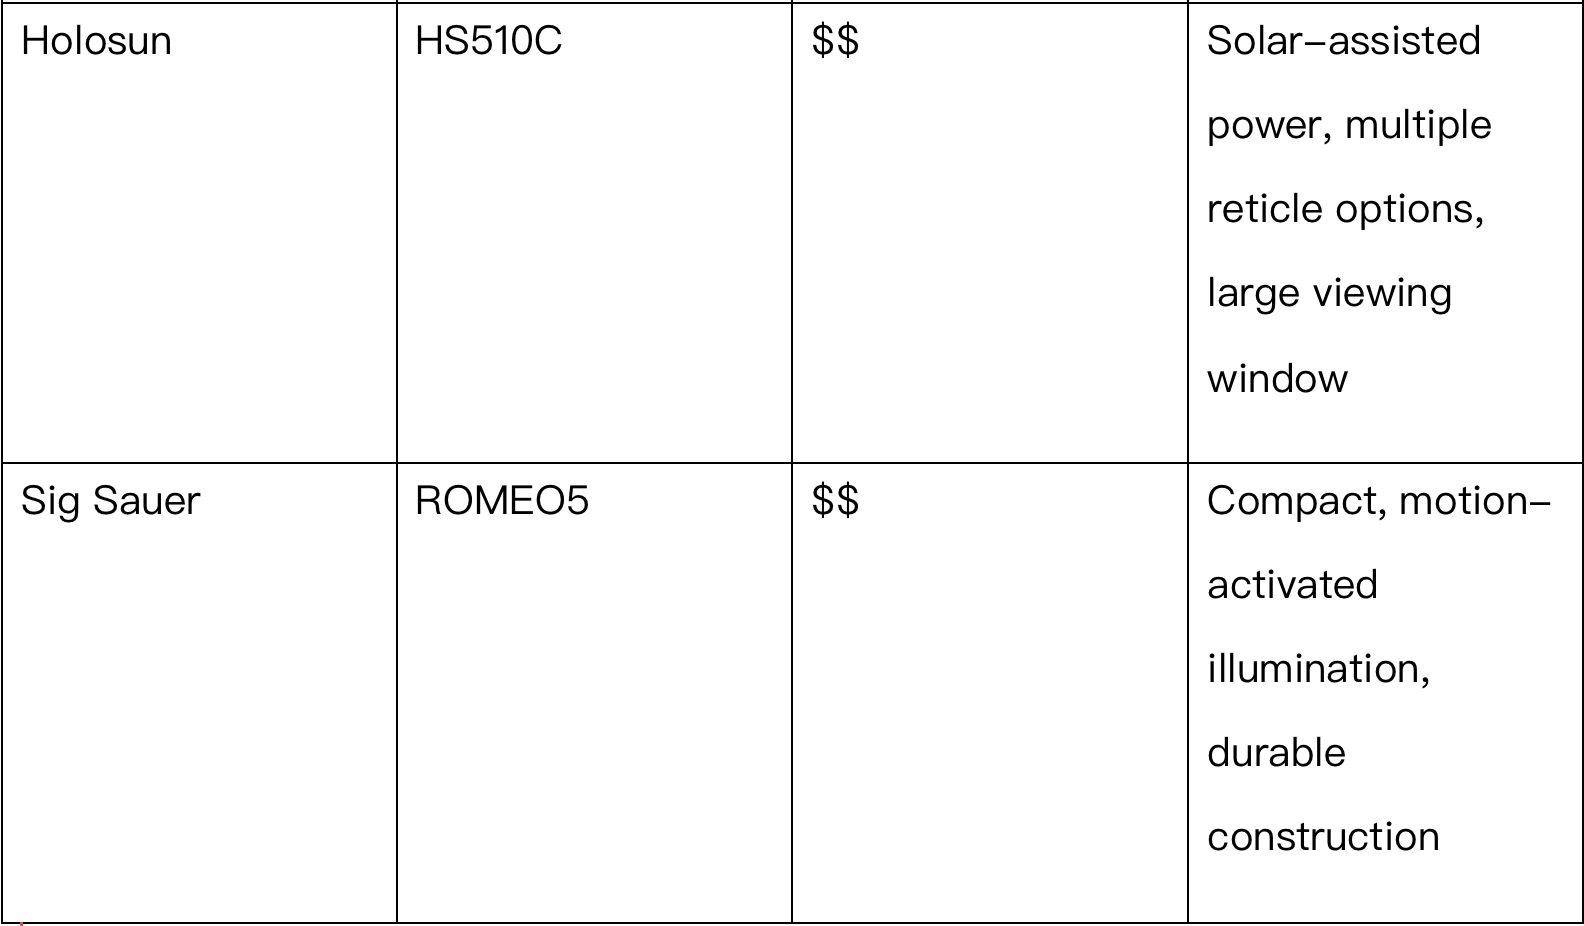
To help you find the perfect Red Dot Sight for your AR-15, we’ve compiled a list of some popular models and brands that cater to various needs and budgets:
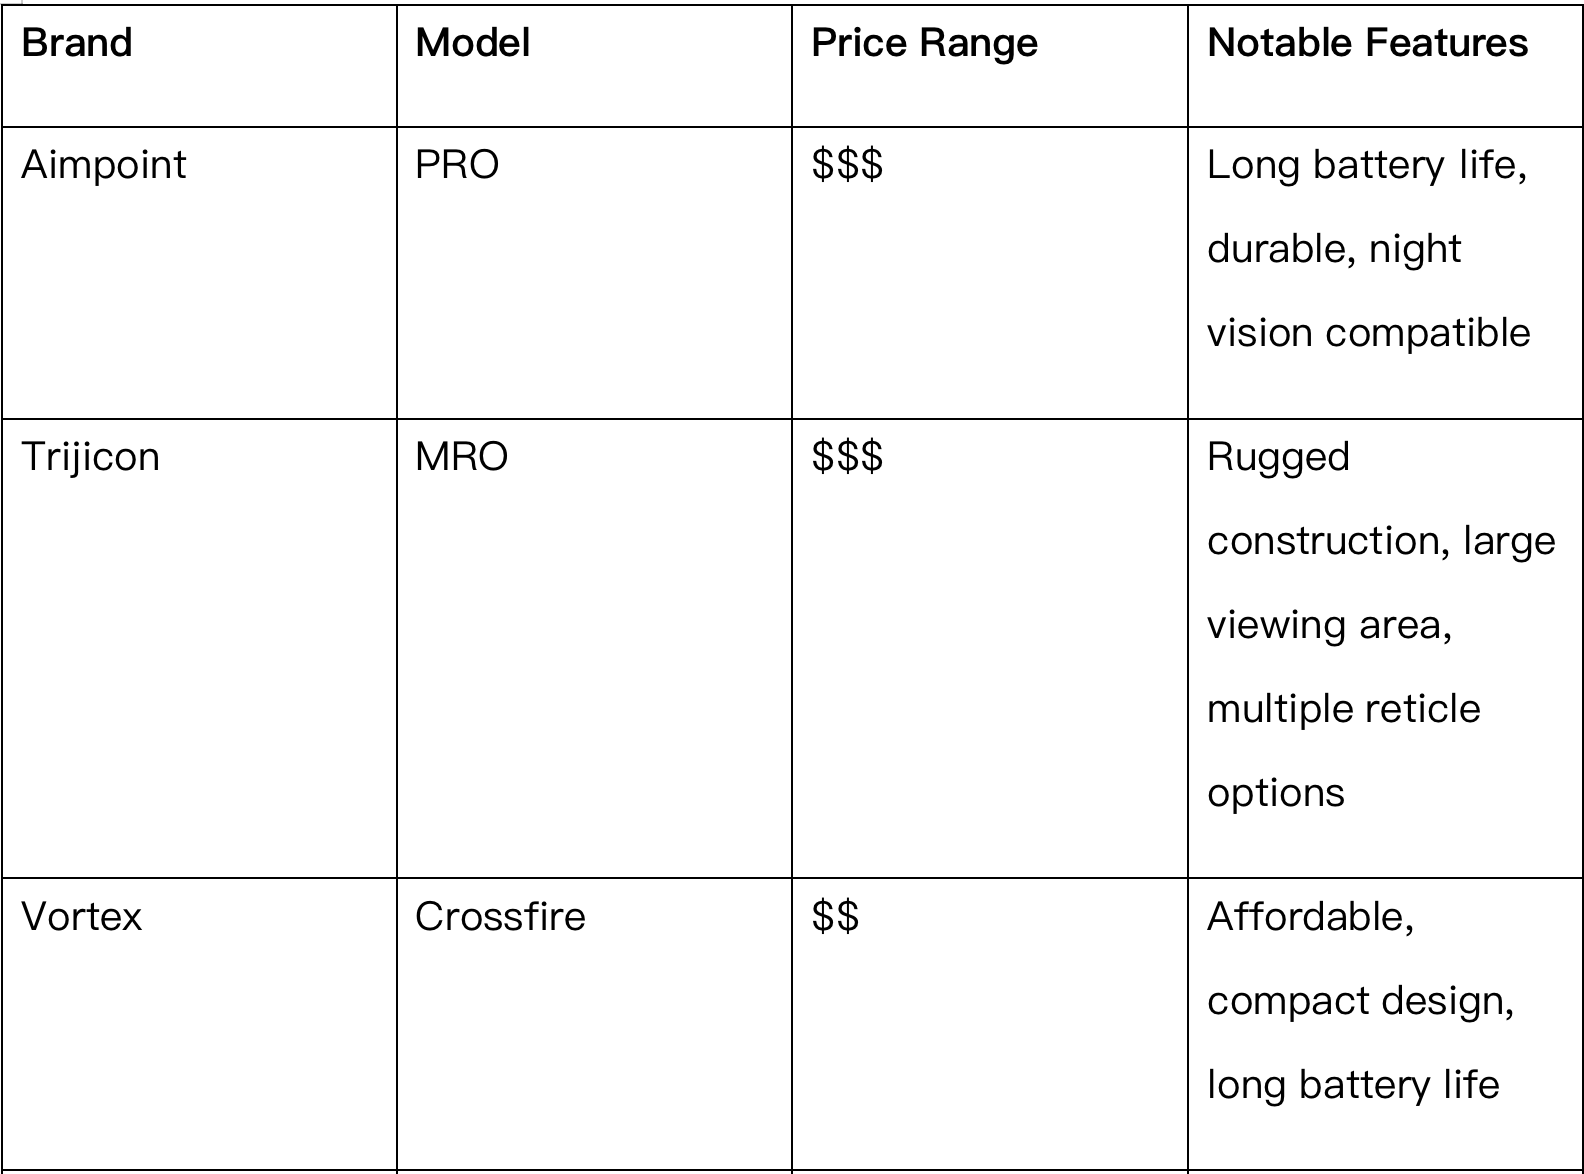
By carefully considering the factors outlined above and exploring the recommended models and brands, you’ll be well on your way to selecting the perfect Red Dot Sight for your AR-15. With the right sight in hand, you’ll be ready to tackle the next step: attaching and aligning it properly to maximize accuracy and enhance your overall shooting performance.
Step-by-Step Guide to Attaching a Red Dot Sight to Your AR-15
Now that you’ve selected the perfect Red Dot Sight for your AR-15, it’s time to learn how to attach it securely and correctly. Proper installation is crucial for optimal performance and accuracy. In this section, we’ll walk you through a step-by-step guide to attaching a Red Dot Sight to your AR-15, covering essential aspects like choosing the right mount, proper placement, and securing the sight firmly.
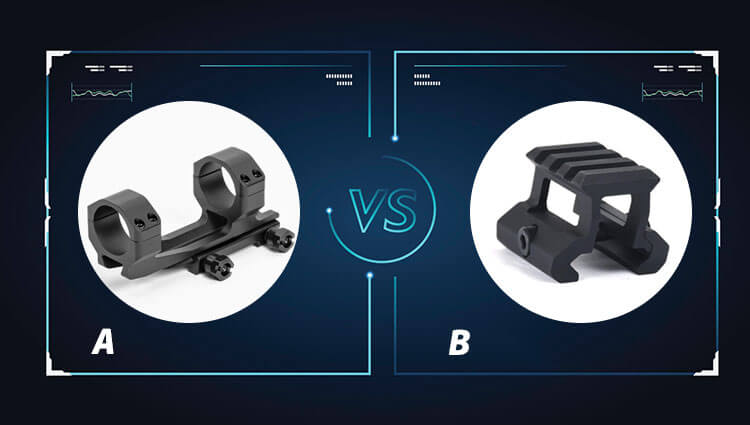
Choosing the right mount (riser vs. cantilever)
First and foremost, you’ll need to decide on the type of mount that best suits your needs. There are two primary options for mounting a Red Dot Sight on your AR-15: riser mounts and cantilever mounts.
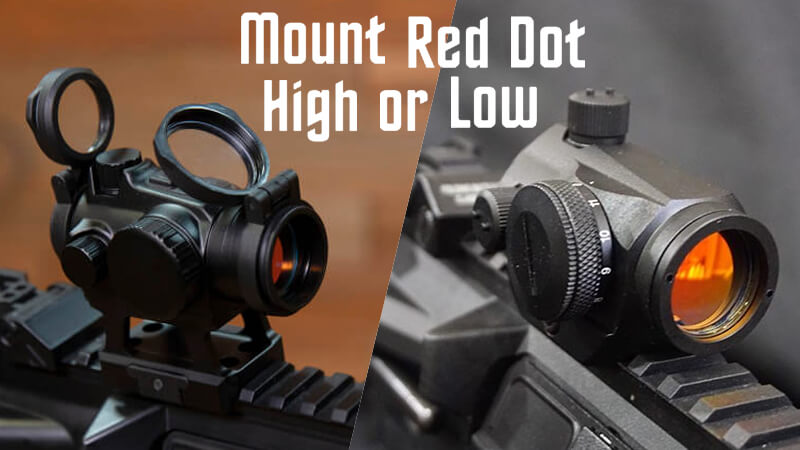
- Riser Mountselevate the sight above the rail, providing additional clearance for backup iron sights or other accessories. These mounts come in various heights, allowing you to achieve the ideal sight alignment and cheek weld for comfortable shooting.
- Cantilever Mountsextend the sight forward over the handguard, freeing up rail space and providing a more extended eye relief. This type of mount is particularly suitable for larger sights or when using magnifiers in conjunction with your Red Dot Sight.
Consider your preferred shooting style, available rail space, and desired sight height when selecting the appropriate mount for your AR-15.
Proper placement and positioning
Once you’ve chosen the right mount, it’s time to position the Red Dot Sight on your AR-15. Follow these steps for proper placement:
- Ensure your rifle is unloaded and pointed in a safe direction.
- Attach your chosen mount to the sight according to the manufacturer’s instructions.
- Loosen the mount’s rail attachment screws and slide the mount onto your AR-15’s rail system.
- Position the sight roughly where your eye naturally focuses when you bring the rifle to your shoulder. This location may vary depending on individual preferences and shooting styles.
- Maintain a comfortable cheek weld and eye relief while ensuring a clear sight picture.
Securing the sight firmly
After finding the optimal position for your Red Dot Sight, it’s crucial to secure it firmly to prevent movement and maintain accuracy. Follow these steps to properly secure your sight:
- Tighten the rail attachment screws on the mount according to the manufacturer’s torque specifications. Over-tightening can damage the mount or rail, while under-tightening may cause the sight to shift during recoil.
- Double-check the sight’s alignment by shouldering the rifle and acquiring a sight picture. Make any necessary adjustments before proceeding.
- If available, use thread-locking compound on the screws to prevent them from loosening due to recoil and vibration.
With your Red Dot Sight securely attached and properly positioned on your AR-15, you’re ready to move on to the next important step: aligning the sight and zeroing it in for precise shooting. In the following section, we’ll provide detailed guidance on how to achieve optimal alignment and zeroing for your newly installed Red Dot Sight.
Aligning the Red Dot Sight with the Front Sight for Maximum Precision
With your Red Dot Sight securely attached to your AR-15, it’s time to align it with the front sight for maximum precision. Proper alignment and zeroing ensure that your point of aim corresponds accurately with your point of impact. In this section, we’ll explore co-witnessing options, as well as techniques and distances for zeroing in your Red Dot Sight.

Co-witnessing: absolute vs. lower-third co-witness
Co-witnessing refers to the alignment of your Red Dot Sight reticle with your rifle’s iron sights. This setup serves as a backup aiming method in case your Red Dot Sight malfunctions or runs out of power. There are two primary co-witnessing options:
- Absolute Co-witness:In this configuration, the Red Dot Sight reticle aligns directly with the iron sights when viewed through the sight window. Both the red dot and iron sights sit on the same visual plane, allowing for seamless transition between sighting systems.
- Lower-Third Co-witness:The lower-third co-witness places the Red Dot Sight reticle slightly above the iron sights. In this setup, the iron sights occupy the lower third of the sight window, while the reticle hovers above them. This configuration provides an unobstructed view of the reticle, even if the iron sights are folded down or removed.
Choose the co-witnessing option that best suits your shooting style and preferences, keeping in mind that proper cheek weld and eye relief are crucial for accurate aiming.
Zeroing in the sight: techniques and distances
Once you’ve established your preferred co-witnessing setup, you’ll need to zero in your Red Dot Sight to ensure precise shots at various distances. Follow these steps to zero in your sight effectively:
- Set up a target at your desired zeroing distance. Common zeroing distances for Red Dot Sights on AR-15 rifles are 25, 50, or 100 yards.
- Use a stable shooting platform, such as a benchrest or bipod, to eliminate as much movement as possible during the zeroing process.
- Fire a 3-5 shot group at the target, aiming consistently at the center point.
- Observe the point of impact and determine the necessary adjustments for windage (horizontal) and elevation (vertical) based on your sight’s adjustment values (e.g., 1 click = 1/2 MOA).
- Make the necessary adjustments to your Red Dot Sight, then fire another 3-5 shot group. Repeat this process until your point of impact consistently aligns with your point of aim.
With your Red Dot Sight aligned and zeroed in, you’re now ready to put your newfound precision to the test. In the next section, we’ll provide expert tips and techniques for maximizing the effectiveness of your Red Dot Sight, enabling you to make the most of your AR-15’s enhanced accuracy in various hunting scenarios.
Tips for Optimizing the Use of Your Red Dot Sight
A properly aligned and zeroed-in Red Dot Sight can significantly enhance your AR-15’s accuracy and overall performance. However, to fully unlock its potential, it’s essential to maintain and utilize your sight effectively. In this section, we’ll share expert tips on proper maintenance, battery management, and adapting to various shooting scenarios and environments.
Proper maintenance and cleaning
Regular maintenance and cleaning are crucial for ensuring the longevity and performance of your Red Dot Sight. Follow these guidelines to keep your sight in top condition:
- Lens Cleaning:Use a lens cleaning solution and a microfiber cloth to gently clean the sight’s lenses. Avoid using abrasive or harsh chemicals that may damage the lens coatings.
- Exterior Cleaning:Wipe down the exterior of the sight with a damp cloth, removing any dirt, debris, or moisture. Ensure that all adjustment screws and mounting hardware remain tight and free of corrosion.
- Storage:When not in use, store your sight in a cool, dry place to prevent damage from extreme temperatures, humidity, or direct sunlight.
- Inspection:Regularly inspect your sight for signs of wear or damage, addressing any issues promptly to maintain optimal performance.
Battery management and replacement
Proper battery management is essential for maintaining uninterrupted performance during your hunts. Keep these tips in mind to ensure your Red Dot Sight remains powered and ready for action:
- Battery Life:Familiarize yourself with your sight’s battery life and replace the batteries as necessary, according to the manufacturer’s recommendations.
- Spare Batteries:Always carry spare batteries during extended hunting trips to avoid being left without a functioning sight.
- Battery Conservation:Utilize features such as automatic shutoff or motion-activated illumination to extend battery life when the sight is not in active use.
Adapting to different shooting scenarios and environments
A versatile hunter can adapt their Red Dot Sight to various shooting scenarios and environments. Consider these tips to maximize the effectiveness of your sight in diverse situations:
- Brightness Adjustment:Adjust the brightness of your reticle according to ambient lighting conditions to ensure optimal visibility and target acquisition.
- Reticle Selection:If your sight offers multiple reticle options, choose the most suitable reticle for your specific hunting situation and target type.
- Environmental Factors:Be aware of environmental factors such as wind, temperature, and elevation that may impact your shots, and adjust your aiming accordingly.
- Practice:Regularly practice shooting with your Red Dot Sight in different positions, distances, and environments to build confidence and proficiency.
By following these expert tips, you’ll be well-equipped to optimize the use of your Red Dot Sight, enhancing your AR-15’s performance and versatility in various hunting scenarios. As a final step, we’ll share some valuable resources and references to help you further hone your skills and knowledge, ensuring that you’re always prepared to make the most of your Red Dot Sight-equipped AR-15 in the field.
Conclusion: Taking Your AR-15 Accuracy to New Heights with a Red Dot Sight
In conclusion, investing in a quality Red Dot Sight can significantly enhance your AR-15’s accuracy and overall hunting performance. By following the guidance provided throughout this article, you’ll be well-equipped to select the perfect sight for your needs, install it correctly, and utilize it effectively in various hunting scenarios.
To recap, here are the key takeaways from our comprehensive guide:
- Selecting the Perfect Red Dot Sight:Consider factors such as size, weight, battery life, reticle options, and durability when choosing the right sight for your AR-15. Explore reputable brands and models that cater to various budgets and preferences.
- Attaching the Sight:Choose the appropriate mount (riser or cantilever) for your setup and ensure proper placement and positioning on your AR-15’s rail system. Secure the sight firmly to maintain accuracy during use.
- Aligning and Zeroing:Establish your preferred co-witnessing method (absolute or lower-third) and zero in your sight at a suitable distance (25, 50, or 100 yards) to ensure precise shots.
- Optimizing Use:Maintain and clean your sight regularly, manage battery life effectively, and adapt to different shooting scenarios and environments to maximize your Red Dot Sight’s effectiveness.
By implementing these expert tips and techniques, you’ll be well on your way to taking your AR-15 accuracy to new heights with a Red Dot Sight. As you continue to hone your skills and knowledge, remember that practice and experience are essential for becoming a proficient hunter. Embrace every opportunity to learn and grow, and you’ll soon become a master at utilizing your Red Dot Sight-equipped AR-15 to its fullest potential in the field.
Takeaway: Key Points to Remember for Achieving Precise Aiming with a Red Dot Sight on Your AR-15
As we’ve explored throughout this comprehensive guide, the addition of a Red Dot Sight to your AR-15 can significantly enhance your rifle’s accuracy and overall performance. To help you retain the most crucial information, we’ve compiled a list of key points that every hunting enthusiast should remember when aiming to achieve precise shots with a Red Dot Sight-equipped AR-15:
- Selecting the Ideal Sight:Carefully consider factors such as size, weight, battery life, reticle options, and durability when choosing the perfect sight for your AR-15. Reputable brands and models cater to a variety of budgets and preferences.
- Proper Mounting:Choose between a riser or cantilever mount based on your preferred shooting style and available rail space. Ensure the mount is securely attached and positioned correctly on your AR-15’s rail system.
- Co-witnessing Options:Decide between absolute and lower-third co-witnessing, aligning your Red Dot Sight reticle with your iron sights for seamless transitioning between sighting systems.
- Zeroing Techniques:Zero in your sight at an appropriate distance (commonly 25, 50, or 100 yards) by adjusting windage and elevation settings until your point of impact consistently matches your point of aim.
- Regular Maintenance:Keep your Red Dot Sight in optimal condition through proper cleaning, storage, and inspection of lenses, exterior components, and mounting hardware.
- Battery Management:Familiarize yourself with your sight’s battery life, carry spare batteries during extended hunting trips, and utilize battery conservation features when available.
- Adapting to Different Scenarios:Adjust your Red Dot Sight’s brightness, reticle selection, and aiming techniques according to various shooting scenarios and environmental factors.
- Practice Makes Perfect:Regularly practice shooting with your Red Dot Sight-equipped AR-15 to build confidence and proficiency in different positions, distances, and environments.
By keeping these key points in mind and applying the expert guidance provided throughout this article, you’ll be well-prepared to achieve precise aiming with a Red Dot Sight on your AR-15. Continue to refine your skills, learn from your experiences, and embrace new challenges to become a true master of your craft. Happy hunting!


Leave A Comment
You must be logged in to post a comment.